index

bootc-installer
Graphical installers that put a bootc container image on a disk.
One backend, five desktop frontends, your brand.
bootc-installer installs an operating system that ships as a bootc container image. A wizard asks for a disk, an encryption mode and a user account. Then the fisherman backend partitions the disk, installs the image and prepares the first boot.
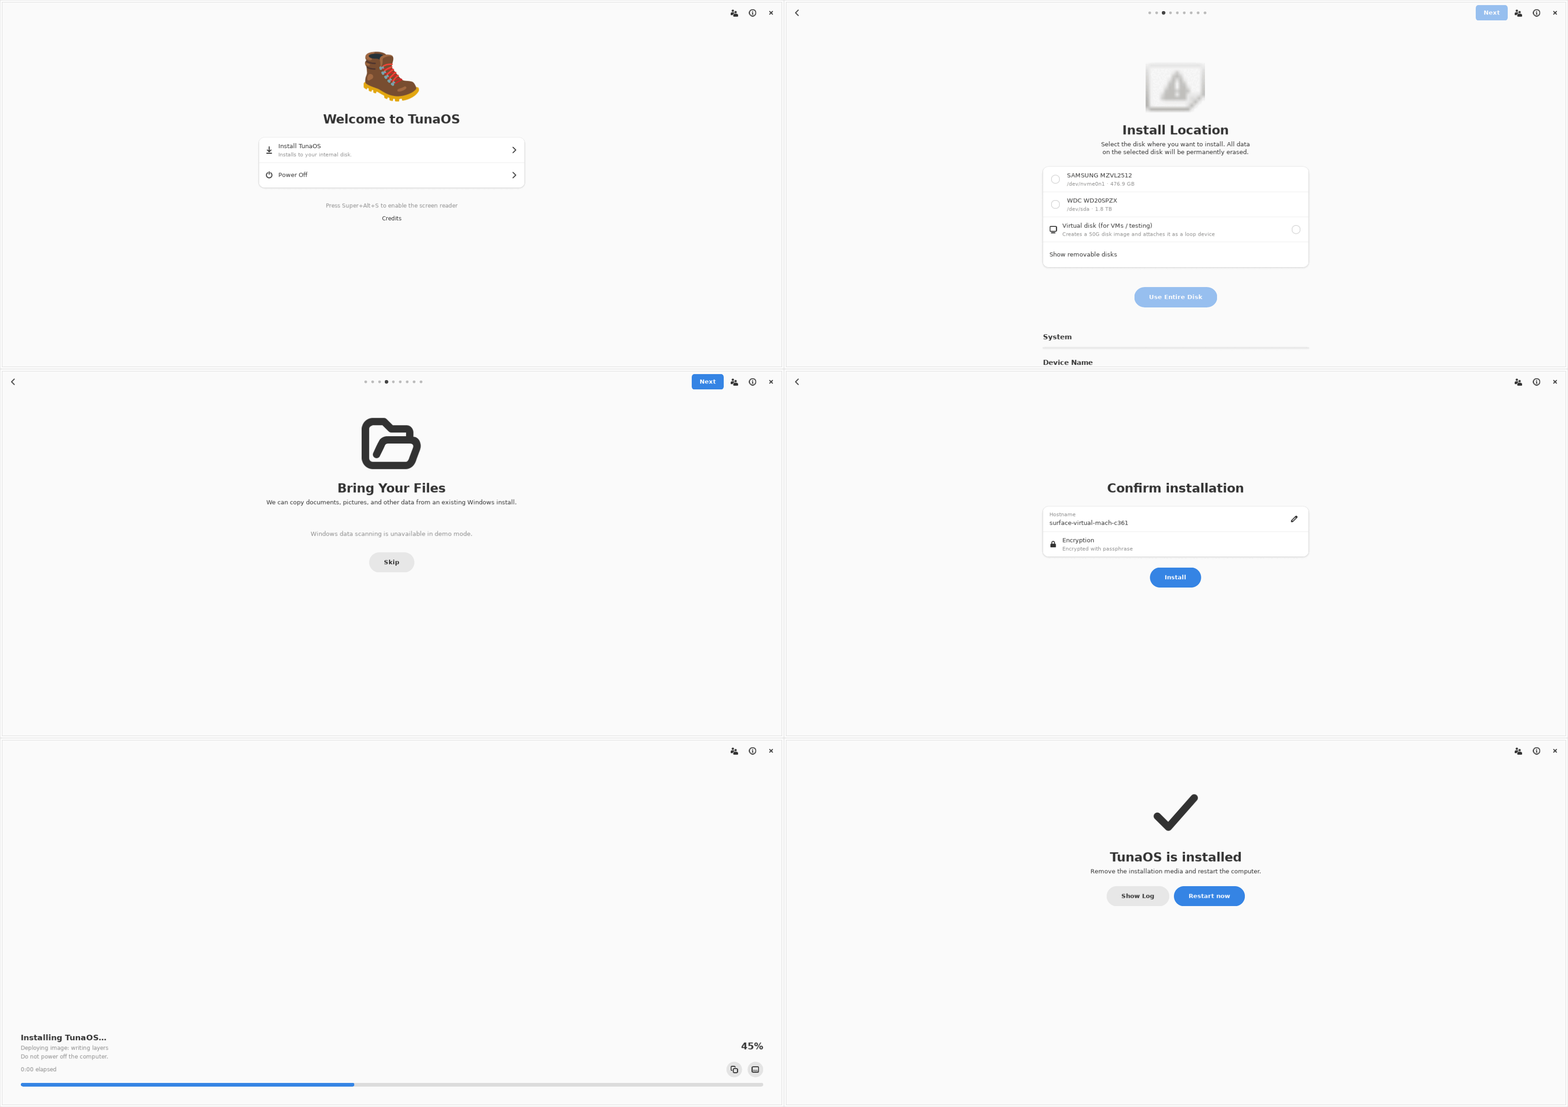
Why you need it
A bootc image is a container image that boots.
You build it with a Containerfile, and you update a computer with bootc upgrade.
But a container image is not on a disk until something puts it there.
bootc has commands for that step: bootc install to-disk and bootc install to-filesystem.
They are command-line tools for an administrator.
A person who downloads your live ISO needs more than a command:
- A wizard in the style of the desktop that the ISO starts.
- A check that the computer has enough RAM, a usable disk and UEFI.
- Disk encryption with a passphrase or the TPM, and a recovery key.
- A user account and a hostname.
- A progress bar, a log when the install fails, and a restart button.
- An install with no network, from the image on the ISO.
bootc-installer supplies these parts. You supply the image.
Who it is for
| You are | You get |
|---|---|
| The builder of a bootc image | An installer for your live ISO. You set the name, the artwork, the text and the image catalog in /etc/bootc-installer/. You do not fork the code. Refer to Customise the installer for your image. |
| The maintainer of a desktop spin | A frontend in the toolkit of your desktop: GNOME, KDE Plasma, COSMIC, Niri or XFCE. All five drive the same backend with the same recipe. |
| A person with a computer | The installer on the live ISO of your distribution. You can also run it as a Flatpak on a Linux system that you have now. |
| An administrator | An unattended install from a JSON recipe. Refer to Recipes and autoinstall. |
[!WARNING] An install erases the disk that you select. Make a backup of your data before you start. The confirm screen shows the disk and the data that the install removes.
Install
curl -Lo installer.flatpak \
  https://github.com/tuna-os/bootc-installer/releases/latest/download/org.bootcinstaller.Installer.flatpak \
  && sudo flatpak uninstall -y org.bootcinstaller.Installer org.bootcos.Installer 2>/dev/null; sudo flatpak install --bundle -y installer.flatpak
flatpak run org.bootcinstaller.Installer
For the devel build and a tour of each screen, refer to Install and use the installer.
Features
- Two boot stacks. systemd-boot with composefs for sealed images such as Dakota. GRUB2 for images such as Bluefin and Bazzite. The partition layout follows the boot stack.
- Disk encryption. LUKS2 with a passphrase, with the TPM2, or with the two together. For a TPM-only install, the installer shows a recovery key and holds the restart until you confirm it.
- An image catalog. Each frontend lists the images in fisherman's catalog, or in the catalog that your ISO ships.
- A user account, when the image needs one. The account is an administrator.
- A hardware check. The installer reads RAM, CPU, UEFI, TPM and disks from
fisherman probe, and tells you what does not qualify. - Offline install. On a live ISO, the installer uses the image on the media and does not use the network.
- Fast first boot. The backend copies the Wi-Fi and Bluetooth setup from the live session, and fills the caches.
- Your brand. A
branding.jsonfile sets the product name, the text and the artwork. The code has no product name. - Unattended install (GNOME and XFCE).
--autoinstallreads a JSON recipe and does not show the wizard. - A phone companion (GNOME, COSMIC and XFCE). Scan a QR code and type your account data on a phone.
The frontends do not have all features yet, and some features have open defects.
docs/PARITY.md shows what each frontend does and links the issues.
The installer does not set the language, the keyboard layout or the time zone of the new system yet.
How it works
 frontend (wizard)  ──recipe JSON on stdin──▶  fisherman (root)  ──▶  disk
        ▲                                            │
        └──────── progress as JSON lines ────────────┘
- The frontend asks
fisherman probe --jsonfor the disks and the hardware. - The frontend checks each field with
fisherman validatewhile you type. - The frontend writes the recipe to the standard input of fisherman. No file holds the recipe, because the recipe contains the passphrase and the password.
- fisherman partitions the disk, encrypts it, runs
bootc install to-filesystemand configures the new system. - The frontend shows the progress, then the recovery key and the restart button.
In a Flatpak, the frontend starts fisherman on the host with flatpak-spawn --host pkexec.
How an install works gives each step.
Guidebook
The guidebook has the full documentation:
| Page | Contents |
|---|---|
| Install and use the installer | Production and devel builds, and the wizard screen by screen |
| How an install works | Boot stacks, the install steps, encryption and first boot |
| Recipes and autoinstall | Recipe examples, field reference and unattended install |
| Customise the installer for your image | Your own catalog and defaults in /etc/bootc-installer/, and new catalog images |
| Build, test and release | Build, demo mode, tests, screenshots and the release flow |
Frontends
This repository holds all five frontends.
They share the fisherman backend, the recipe schema and the screen contract in shared/.
CI renders all five frontends in docs/walkthrough/.
On a live ISO, each frontend starts fisherman on the host.
The file /etc/bootc-installer/live-iso-mode tells fisherman that the image is on the media.
fisherman then checks the image on the media before it reads a disk or uses the network.
docs/live-iso.md tells you how to build such an ISO.
fisherman is a git submodule.
Every Flatpak builds fisherman from that submodule, so the gitlink is the only pin.
The four frontend manifests use the shared module shared/flatpak/fisherman.json.
Renovate keeps the gitlink current.
To move it by hand, run shared/ci/fisherman_pins.py.
| Frontend | Path | Toolkit | Walkthrough |
|---|---|---|---|
| GNOME | bootc_installer/ | GTK4 / libadwaita (Python) | docs/gui-walkthrough.md |
| KDE Plasma | frontends/kde/ | Qt 6 / Kirigami | frontends/kde/docs/gui-walkthrough.md |
| COSMIC | frontends/cosmic/ | libcosmic (Rust) | frontends/cosmic/docs/gui-walkthrough.md |
| Niri | frontends/niri/ | Quickshell QML + Go | frontends/niri/docs/gui-walkthrough.md |
| XFCE | frontends/xfce/ | GTK3 / PyGObject | frontends/xfce/docs/gui-walkthrough.md |
CI moves a release from dev to prod when all checks pass: docs/RELEASE.md.
For the merge of the old repositories, refer to docs/MIGRATION.md.
Contribute
Read the contribution guide and Build, test and release.
Open pull requests against dev.
Contribute compute — no code needed
Your machine runs one task at a time using your signed-in AI coding CLI. The relay alternates between eligible School (OS) and Reef (apps) hives after each task. If one hive has no work, the other can continue.
The guide covers prerequisites, verified just setup, credentials, provider
costs, and how to stop with Ctrl+C. Your subscription quota or API charges apply.
Never post account credentials or API keys in issues or pull requests.